






Heavy Truck Brake Drum Wear: Inspection Limits and Replacement Warning Signs
A loaded truck comes into the yard after a long descent, and the driver mentions a faint pull during braking. During the walk-around, one wheel end smells hotter than the others. The drum may still look intact from the outside, so it is tempting to release the vehicle and “keep an eye on it.” That is where heavy truck brake drum wear becomes a practical maintenance problem rather than a workshop detail.
A brake drum can lose usable material gradually, develop heat-related damage after a single severe event, or become distorted by an underlying brake adjustment or wheel-end issue. Any of these conditions can reduce braking consistency, accelerate lining wear, create vibration, and turn a scheduled inspection into an unplanned roadside repair. The safest decision is not based on appearance alone. It comes from a repeatable inspection method, measured limits, and a clear rule for when replacement is the only reasonable option.
Start with the complaint, not the drum alone
When a vehicle arrives with brake-related symptoms, the drum should be inspected in the context of the whole wheel end. A worn drum is often the visible result of another condition. If that condition remains, fitting a new drum may only delay the next failure.
Common triggers for inspection include a steering-wheel shake under braking, a pulsing brake pedal, reduced stopping confidence, repeated brake fade on grades, uneven lining wear, wheel-end overheating, or a truck that drifts to one side when the brakes are applied. Some symptoms are more obvious at high load or after repeated brake applications. Others appear only during a periodic strip inspection, when the linings and drum surface can be seen directly.
Before removing components, record the concern in practical terms: which axle is affected, whether the issue happens cold or hot, whether it changes with load, and whether recent brake, hub, bearing, or suspension work has been performed. This short record helps separate a true drum problem from loose bearings, contaminated linings, incorrect adjustment, a sticking actuator, or tire-related vibration.
Do not judge serviceability by the outer surface
The outside of a brake drum can appear normal while the braking surface has become oversized, tapered, heat-checked, or scored. Conversely, light surface discoloration does not automatically mean the drum has failed. The friction face, the drum mounting area, and the structural condition all need attention.
After the wheel and brake assembly are safely prepared for inspection, clean loose dust and debris using an approved method. Avoid practices that spread brake dust into the air. With the friction surface visible, look for the following conditions before reaching for measuring tools:
- Deep scoring or grooves: Shallow marks may be evaluated against the drum manufacturer’s service guidance, but grooves that catch a fingernail or indicate metal-to-metal contact deserve close attention.
- Heat checking: Fine surface cracks can occur after thermal cycling. Their pattern, depth, and location matter. Cracks extending toward edges, mounting areas, or structural sections are more serious than superficial marks.
- Blue, purple, or dark heat staining: Color alone is not a condemnation criterion, but it signals that overheating may have changed the drum surface or shape.
- Hard spots: Localized hardened areas can cause uneven friction and brake grab. They may be felt as irregular pedal response or vibration.
- Cracks around bolt holes, pilot areas, or the outer rim: These are not cosmetic defects. Structural cracking generally calls for removal from service.
- Edge lips: A pronounced ridge near the edge of the friction path may indicate substantial wear or that the lining has not contacted the full surface correctly.
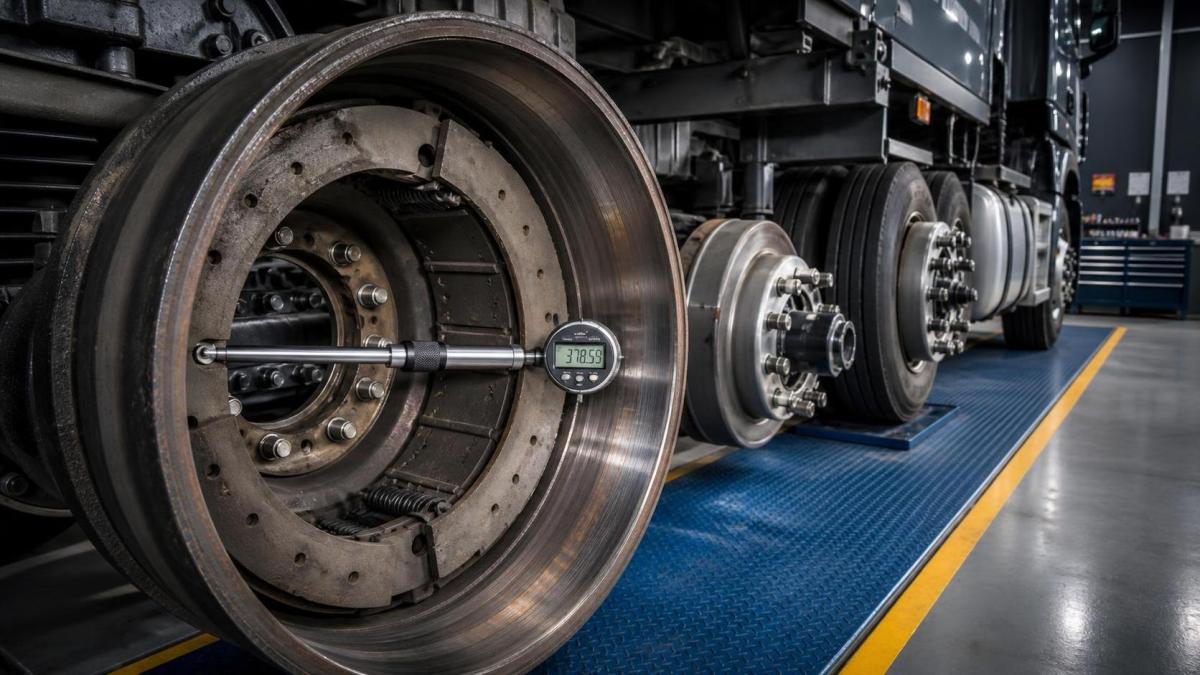
A frequent mistake is to focus only on the drum and overlook the linings. A damaged lining, broken rivet, seized brake hardware, or improperly retracting brake can score a drum quickly. If the lining thickness is acceptable but wear is concentrated at one end, investigate alignment, anchor points, rollers, camshaft movement, and adjustment before deciding the drum is the original cause.
Measuring diameter: the limit is the drum’s marked maximum, not a guessed number
The most important dimensional check for a heavy truck brake drum is the inside diameter. Every drum design has a maximum allowable rebore or discard diameter established by its manufacturer. That limit may be cast into the drum, stamped on it, included in product documentation, or specified in the vehicle service information. It must not be replaced with a general number taken from a different axle, drum size, or application.
Measure with a suitable inside micrometer, drum gauge, or calibrated bore-measuring tool. A tape measure is not accurate enough for this decision. Take readings at several positions around the circumference and at more than one depth across the friction surface. This approach reveals three different concerns:
- Overall diameter: Whether wear or machining has brought the drum close to, or beyond, its permitted maximum diameter.
- Out-of-round condition: Whether the drum diameter varies as the gauge is moved around the circumference.
- Taper: Whether the diameter differs from the inner to the outer portion of the friction track.
Record the highest reading, not just the average. A drum with one acceptable reading and one oversized reading is not acceptable simply because the mean appears lower. Compare the highest measured diameter with the exact maximum diameter for that drum. If the result exceeds the limit, the drum should be replaced. If it is very near the limit, consider the remaining margin together with surface condition and the likelihood that machining would remove additional material.
Measurement also has to be meaningful. A dirty surface, rust buildup, a gauge held at an angle, or a tool that has not been checked can produce misleading results. Clean the contact path, confirm the tool’s condition, and repeat a questionable reading. Where an internal process requires traceability, note the drum identification, axle position, measurement points, tool used, and the person completing the inspection.
When resurfacing makes sense—and when it does not
Resurfacing can restore a usable braking surface only when the drum remains structurally sound and enough material exists below the maximum diameter limit. It is not a cure for every defect. The decision should account for the amount of material needed to clean the surface, not merely the current measurement.
If shallow scoring is the only issue and the drum has adequate remaining allowance, machining may be considered according to the applicable service guidance. The finished surface must be within the diameter limit and suitable for the lining material used. A drum that needs heavy cutting to remove heat damage, deep grooves, or severe taper may end up too close to its limit to be a sensible candidate.
Replacement is generally the safer route when there is structural cracking, excessive diameter, significant distortion, repeated overheating evidence, severe hard spotting, or damage that cannot be removed without exceeding the allowable dimension. A drum should also be replaced when its condition prevents a predictable bedding-in period for new linings.
Do not mix replacement decisions with convenience decisions. Replacing only one drum on an axle may be appropriate in some maintenance situations, but brake balance, companion component condition, and vehicle service requirements should be evaluated before returning the truck to work. Matching drum type, friction characteristics, and installation condition across the axle helps avoid uneven response.
Warning signs that should move replacement from “later” to “now”
Some conditions do not leave much room for monitoring. Remove the vehicle from normal operation and arrange a qualified inspection when a drum shows a visible crack, a broken section, obvious signs of severe overheating, or metal-to-metal contact damage. The same applies when the measured diameter is beyond the marked maximum.
Other warning signs require prompt diagnosis because they may lead to drum damage even if the drum has not yet crossed its discard limit. These include one wheel end repeatedly running hotter than comparable positions, abnormal smoke or odor after ordinary braking, an actuator that does not release correctly, persistent brake drag, or a vehicle that develops worsening brake vibration. Continuing to operate under these conditions can overheat a serviceable drum and damage the linings, hub seals, bearings, and related hardware.
A sudden change after brake work is also worth treating seriously. If a vehicle develops pull, noise, or pulsation after new linings, drums, hubs, or adjustment work, verify assembly details instead of assuming the parts need time to settle. Incorrect hardware placement, contaminated friction surfaces, improper adjustment, or mismatched components can create symptoms that resemble drum wear.
A practical inspection sequence for the workshop floor
A disciplined sequence reduces missed defects and makes decisions easier to explain later. Begin by securing the vehicle, following the applicable lifting and wheel-removal procedures, and allowing overheated components to cool. Review the driver’s report and recent maintenance history before disassembly.
- Inspect the wheel end for signs of lubricant leakage, loose adjustment, damaged hardware, or unusual heat exposure.
- Check lining condition and wear pattern. Look for glazing, cracking, contamination, loose material, and contact that is uneven across the lining face.
- Clean and visually inspect the full friction surface of the drum, including edges and mounting areas.
- Measure internal diameter at multiple locations and compare the highest reading with the drum-specific maximum limit.
- Assess out-of-round and taper using the recorded measurements. Investigate underlying causes if either is excessive under the applicable specification.
- Determine whether surface correction is permitted and whether it will leave sufficient material. If not, replace the drum.
- Correct the source of abnormal wear before assembly: brake drag, poor adjustment, worn cam components, hub movement, bearing play, or contamination.
- After reassembly, verify adjustment, wheel rotation, and brake response in accordance with the vehicle’s maintenance procedure.
It is useful to treat measurement records as part of the repair, not paperwork added afterward. A clear record protects consistency across shifts and helps identify patterns, such as recurring heat damage on a particular route, axle position, or maintenance interval.
Parts planning matters when brake findings uncover wider work
Brake drum replacement sometimes coincides with broader drivetrain or wheel-end maintenance, especially when a vehicle is already down for inspection. Keeping repair planning organized prevents unrelated parts from being selected by appearance rather than application. For fleets and repair operations sourcing multiple heavy-duty components, product identification should always be tied to the vehicle configuration and verified technical requirements.
For example, when a separate driveline repair is being planned for compatible vehicle applications, the part description should be checked carefully rather than treated as interchangeable: Crown Wheel and Pinion 18/27 3463501739 for Mercedes-Benz Actros MP1 / MP2 & MAN TGA / TGM / F2000. This is a separate drivetrain component, not a brake drum substitute, but it illustrates why accurate part matching is important whenever several repair tasks are handled during one service window.
Preventing the next premature drum failure
Long drum life depends less on a single inspection than on controlling the conditions that create heat and uneven contact. Brake adjustment should be checked at appropriate service intervals. Linings should be replaced before worn friction material exposes rivets or backing plates. Lubricant leaks should be corrected quickly, because contaminated linings can change friction behavior and encourage localized overheating.
Driver feedback also has value. Reports of pulling, fade, vibration, burning smell, or reduced response should be logged while the details are fresh. A brief report can point maintenance staff toward a developing issue before the heavy truck brake drum reaches a replacement condition.
The central rule is simple: use the drum’s own specified limit, measure in more than one place, and never separate the drum from the brake system around it. A drum that is within diameter limit but paired with dragging brakes is not a completed repair. A drum with acceptable color but structural cracks is not a candidate for continued service. Careful inspection turns uncertain symptoms into a defensible maintenance decision and helps keep braking performance predictable under demanding loads.